Thursday, November 7, 2024
The ultimate guide to building a lean-to storage shed

Alright, let's talk about storage sheds. We all have that "stuff" - garden tools, lawnmower, maybe even a vintage Vespa (hey, you never know!). A good storage shed is a lifesaver, keeping your things dry, organized, and out of sight. And you know what's even better than a good storage shed? A lean-to storage shed. They're super simple, affordable, and surprisingly spacious. Ready to jump in? Let's build!
Step 1: Location, Location, Location (And Permits!)
First things first, where are you going to put this beauty? Choose a spot on your property that's level, well-drained, and close to where you need to access your stuff. Think about:
Sunshine: Do you need to keep things dry? Avoid placing your lean-to in a low spot where water might pool.
Access: Will you need a driveway or pathway for loading and unloading?
Utilities: Think about any electrical connections or water lines you might want to run to your shed.
Local Codes: Before you start digging, check with your local building department about any permits or regulations regarding shed construction.
Step 2: Choosing Your Materials
Now, let's talk about the fun part - choosing your materials!
Foundation: A concrete pad is the most durable option, but you can also build a gravel foundation for a simpler approach.
Framing: Pressure-treated lumber is your best friend for the foundation and floor framing. Use standard framing lumber (2x4s or 2x6s) for the walls and roof.
Sheathing: Plywood or OSB (Oriented Strand Board) are strong and affordable options for sheathing the walls and roof.
Roofing: Shingles, metal, or even corrugated plastic are all good choices for roofing, depending on your budget and style.
Siding: Choose a siding that suits your style and budget. Vinyl, wood, or even corrugated metal are all popular options.
Step 3: Laying the Foundation
Time to get your hands dirty!
Concrete Pad: If you're going for a concrete foundation, pour a pad that's slightly larger than the footprint of your shed. Make sure it's level and use a leveler to get everything just right.
Gravel Foundation: For a simpler foundation, excavate a shallow pit about 4 inches deep and fill it with gravel. Use a tamp down the gravel to create a solid base.
Step 4: Framing the Floor and Walls
Now it's time to get those walls up!
Floor Framing: Build a simple frame using pressure-treated lumber for the floor joists and rim joists. Securely fasten the frame to the foundation.
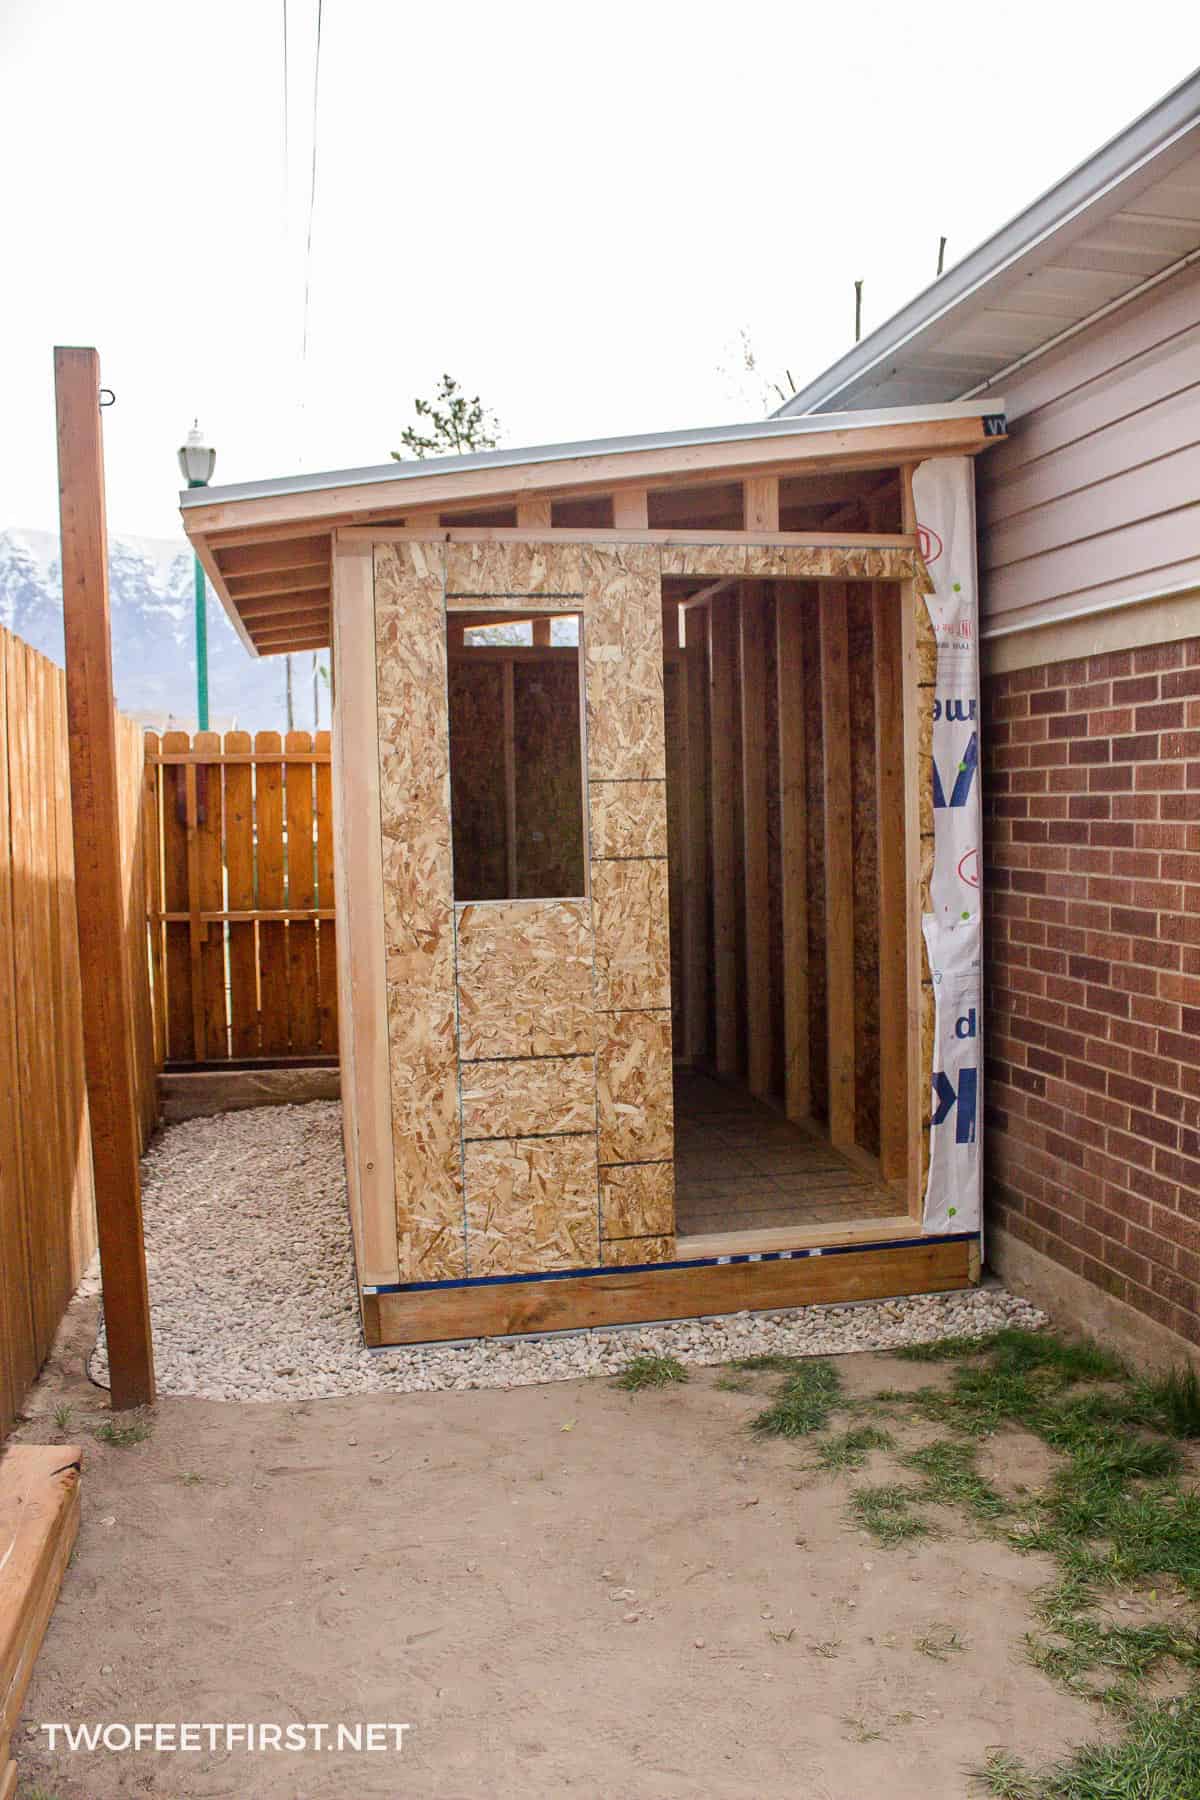
Wall Framing: Construct the wall frames using standard framing lumber. Be sure to check that your walls are plumb (perfectly vertical) and square.
Door and Window Openings: Measure and cut openings for your door and any windows you want to add.
Step 5: Sheathing and Roofing
Alright, let's get that roof on!
Sheathing: Attach plywood or OSB to the walls and roof framing, ensuring they are securely fastened.
Roofing: Install your chosen roofing material following the manufacturer's instructions. Use flashing around any roof penetrations like vents or chimneys.
Siding: After the roof is on, install your chosen siding. This is a great opportunity to add some personality to your shed.
Step 6: Finishing Touches
Almost there!
Doors and Windows: Install your door and any windows you've chosen. Don't forget the hardware!
Interior Finishes: Add a layer of plywood to the interior walls and ceiling for a more finished look. Consider painting the interior for a clean aesthetic.
Lighting and Electrical: If you plan on using electricity, make sure you have a licensed electrician run the wiring and install any necessary outlets.
Storage Solutions: Think about the best way to organize your storage space. Add shelves, hooks, or even a workbench for added functionality.
Step 7: Celebrate Your Success!
Congratulations, you did it! You now have a brand-new, custom lean-to shed for all your storage needs. Take a step back, admire your handiwork, and enjoy the satisfaction of building something with your own two hands.
Bonus Tips:
Plan ahead: Measure twice, cut once. Take your time, plan out your project, and don't be afraid to ask for help from friends or family.
Safety first: Always wear safety glasses and gloves when working with tools and materials.
Invest in quality tools: Good tools make a big difference. Invest in some durable tools that you'll use for years to come.
Don't be afraid to personalize: Add your own flair with paint, trim, or even a custom door design.
Final Thoughts
Building a lean-to shed might seem daunting at first, but it's truly a rewarding experience. With a little planning, patience, and elbow grease, you can create a sturdy and functional storage solution that you'll love for years to come. Remember, building a shed is more than just a project; it's a chance to create something special and add value to your property. So go ahead, embrace your inner builder, and get started! You've got this!
No comments:
Post a Comment