Thursday, November 21, 2024
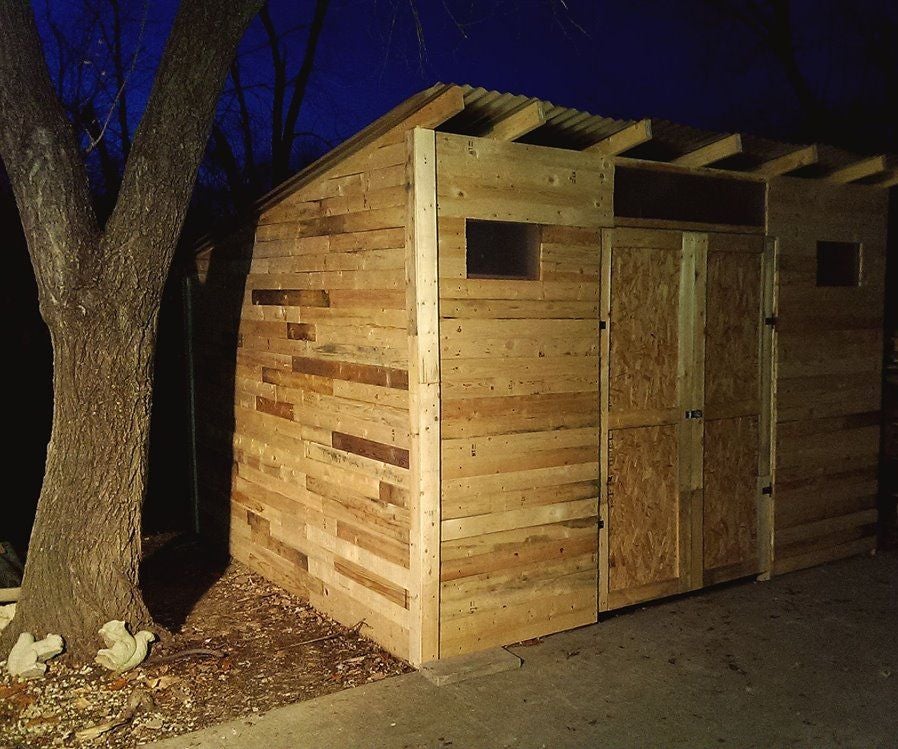
How to Build a Rustic 10x12 Pallet Shed with Repurposed Materials

Building Your Dream Rustic 10x12 Pallet Shed: A Repurposed Paradise
Hey there, fellow DIY enthusiasts! So, you're dreaming of a rustic shed, a charming little sanctuary in your backyard, and you want to build it yourself using reclaimed materials? Fantastic! Building a 10x12 pallet shed is a totally doable project, even for someone with moderate DIY skills. It's a great way to save money, be environmentally conscious, and end up with a truly unique structure. Let's dive in and explore how to bring your vision to life!
Planning Your Pallet Paradise: The Foundation
Before you start hammering away, a little planning goes a long way. This isn't rocket science, but some forethought will save you headaches down the line. First, you've got to decide on the location. Consider sunlight, drainage, proximity to your house, and any local building regulations. You'll also want to check with your homeowner's association if applicable.
Choosing Your Palettes
Now for the fun part â€" sourcing your palettes! The quality of your pallets is crucial. Look for sturdy pallets made of heat-treated lumber (look for the HT stamp). Avoid pallets that show signs of significant rot, insect damage, or chemical treatments you're not comfortable with. Check with local businesses â€" construction sites, grocery stores, and even breweries are often happy to give away their used pallets. Just make sure to get permission first!
Gathering Your Tools and Materials
Beyond the pallets themselves, you'll need a few essential tools and materials. Don't worry, you probably have some of these already! Here's a basic list:
- Measuring tape
- Level
- Hammer
- Saw (circular saw or hand saw)
- Screws (exterior-grade, galvanized are best)
- Drill with drill bits
- Safety glasses
- Work gloves
- Post hole digger (if you're building on posts)
- Concrete mix (if you're using a concrete foundation)
- Optional: Nail gun (speeds things up considerably)
- Optional: Reclaimed wood for trim and accents
Remember, this is a rustic shed. Perfection isn't the goal. Embrace the imperfections of the reclaimed wood â€" they add to the charm!
Building the Foundation: Setting the Stage
Your foundation is the backbone of your shed. You have a couple of options:
Option 1: Concrete Slab
This is the most durable option, but it's also the most labor-intensive. You'll need to dig out the area, level the ground, create a formwork, and pour the concrete. Let it cure completely before moving on. This is probably best for heavier items stored in the shed.
Option 2: Pressure-Treated Wood Posts
A more affordable and quicker option. Dig holes for your posts, set them in concrete, and level them carefully. Make sure they’re deeply enough set into the ground to provide adequate support for the weight of the shed.
Framing Your Pallet Masterpiece
Once your foundation is solid, it's time to start building the frame of your shed. This involves using the pallets to create the walls. This will require some creativity, as pallets aren't standardized and will need adjusting.
Wall Construction
Carefully assess your pallets. Some might be damaged and unusable for load bearing. You'll likely need to disassemble some pallets to get the wood you need and get the framing right. Start by creating a frame for each wall using the sturdiest pallet planks. You can then attach the rest of the pallets to this frame to create the walls. Make sure to reinforce any weak points with additional bracing.
Roof Construction
For the roof, you can get creative. You could use more pallets, but that can add significant weight and might require more structural support. A more straightforward approach might be using plywood or even tarps for the roof structure if you want to keep things simpler and lighter.
Adding the Finishing Touches: Rustic Charm
With the basic structure complete, it's time to add those rustic finishing touches. This is where your creativity really shines! Consider adding reclaimed wood trim around the windows and doors, perhaps even a decorative gable. A coat of weather-resistant sealant will help protect your shed from the elements and enhance its rustic appeal. Don't forget a sturdy door â€" you could even repurpose an old door from a salvage yard!
Personalizing Your Shed
This is your chance to make this shed uniquely yours. Add some shelves inside, perhaps create a small workbench, or even paint it a fun color that complements your yard. You can add some vintage signs or other rustic décor to personalize the space.
Commonly Asked Questions
Q: How long will this project take?
A: This really depends on your experience and how much time you can dedicate to it. Expect to spend several weekends, maybe even a couple of weeks, if you're doing it yourself.
Q: How much will this cost?
A: The beauty of this project is that it can be very affordable. The biggest expense will likely be the screws, sealant, and any additional materials you need beyond the pallets themselves. Your costs will vary greatly depending on your location and materials used.
Q: Do I need any special permits?
A: Check with your local authorities. Depending on your location and the size of your shed, you may need a permit. It’s better to be safe than sorry and check beforehand!
Q: What if I'm not very handy?
A: Don't worry! This project is designed to be approachable for DIYers of all skill levels. There are tons of online resources and videos to guide you through each step. Don't be afraid to ask for help from friends or family if you get stuck!
There you have it! Building a rustic pallet shed is a rewarding project that combines creativity, resourcefulness, and a whole lot of fun. Get started on your dream shed today!
No comments:
Post a Comment