Friday, November 8, 2024
A practical guide to building a 12x20 storage shed yourself

Hey there, fellow DIYer! Ever dreamt of having a space to finally organize all that clutter? Or maybe you need a dedicated workspace for your hobbies? Building your own storage shed is a fantastic way to add value to your property, get your hands dirty, and save a bundle in the process.
A 12x20 shed is a great size â€" spacious enough for tools, lawn equipment, or even a mini workshop, but still manageable to build solo or with a friend. So, let's dive into this project, step-by-step, and make your dream shed a reality!
1. Planning is Key (But Don't Get Too Hung Up!)
Before you start buying lumber and power tools, take a moment to think about what you want your shed to be:
Location: Where will it go on your property? Consider sunlight, drainage, and access for your vehicles.
Foundation: Concrete is ideal for stability, but there are also options like gravel pads or pressure-treated skids for a more budget-friendly approach.
Doors and Windows: How many doors and windows do you need? What size? A single door is sufficient for most storage needs, but consider adding a small window for natural light if you plan on using the shed as a workspace.
Roof Style: A simple gable roof is easy to build, but you could consider a more complex design if you're feeling adventurous.
Interior Layout: Will you need shelves, benches, or a workbench? Think about how you'll use the space to maximize functionality.
Pro Tip: Sketch out your ideas. You don't need to be an architect, just a simple drawing will help you visualize the layout and calculate materials.
2. Getting Your Materials: It's a Shopping Spree (But Be Smart!)
Now for the fun part â€" the materials! Here's a basic list to get you started:
Lumber:
Pressure-treated lumber for the foundation and floor joists
2x4s for framing the walls and roof
2x6s for roof rafters (depending on your roof design)
Plywood for walls, roof sheathing, and subfloor
Fasteners:
Galvanized nails and screws
Construction adhesive
Deck screws for attaching siding and roofing
Roofing:
Shingles or metal roofing (consider your budget and climate)
Underlayment
Siding:
Vinyl, wood, or fiber cement (choose based on your budget and aesthetics)
Doors and Windows:
Pre-hung doors are easier to install
Choose windows that suit your needs and budget
Hardware:
Hinges, door handle, and lock
Window latches
Pro Tip: It's always better to overestimate your lumber needs than to run out halfway through. Consider adding 10-15% extra for cuts, mistakes, and future projects.
3. Building the Foundation: Your Shed's Strong Base
This is the most critical step. A solid foundation ensures your shed stands strong for years. Let's look at two popular options:
Concrete Slab: This requires pouring concrete, which can be a bit messy, but it offers excellent stability.
Pressure-Treated Skids: These are easier to install, especially if you don't have experience with concrete. Just make sure to level the skids properly.
Pro Tip: Consult local building codes for minimum foundation requirements.
4. Framing the Walls: A Sturdy Skeleton
Now, things start taking shape. The walls are the framework that will hold your shed together.
1. Measure and cut wall studs: Use 2x4s for the studs.
2. Attach studs to a bottom plate: This will be the base of your wall.
3. Add top plate: This piece will hold the roof supports.
4. Create wall openings: Carefully cut out openings for doors and windows.
5. Construct and brace the walls: Ensure your walls are plumb and square.
Pro Tip: Use a stud finder to locate existing utilities before drilling or nailing.
5. Building the Roof: A Shelter from the Elements
The roof is a bit more intricate, but don't worry, there are plenty of resources online to guide you.
1. Attach roof rafters: These will be the beams that support the roof sheathing.
2. Install roof sheathing: This plywood layer provides a solid surface for your roofing material.
3. Install roofing: Choose shingles, metal panels, or another material you prefer.
Pro Tip: Don't skip the underlayment. This layer provides an extra barrier against moisture and leaks.
6. Adding the Finishing Touches:
It's time to make your shed look its best!
1. Install siding: This covers the exterior walls and adds aesthetic appeal.
2. Add trim: This adds finishing touches and protects the edges of your siding.
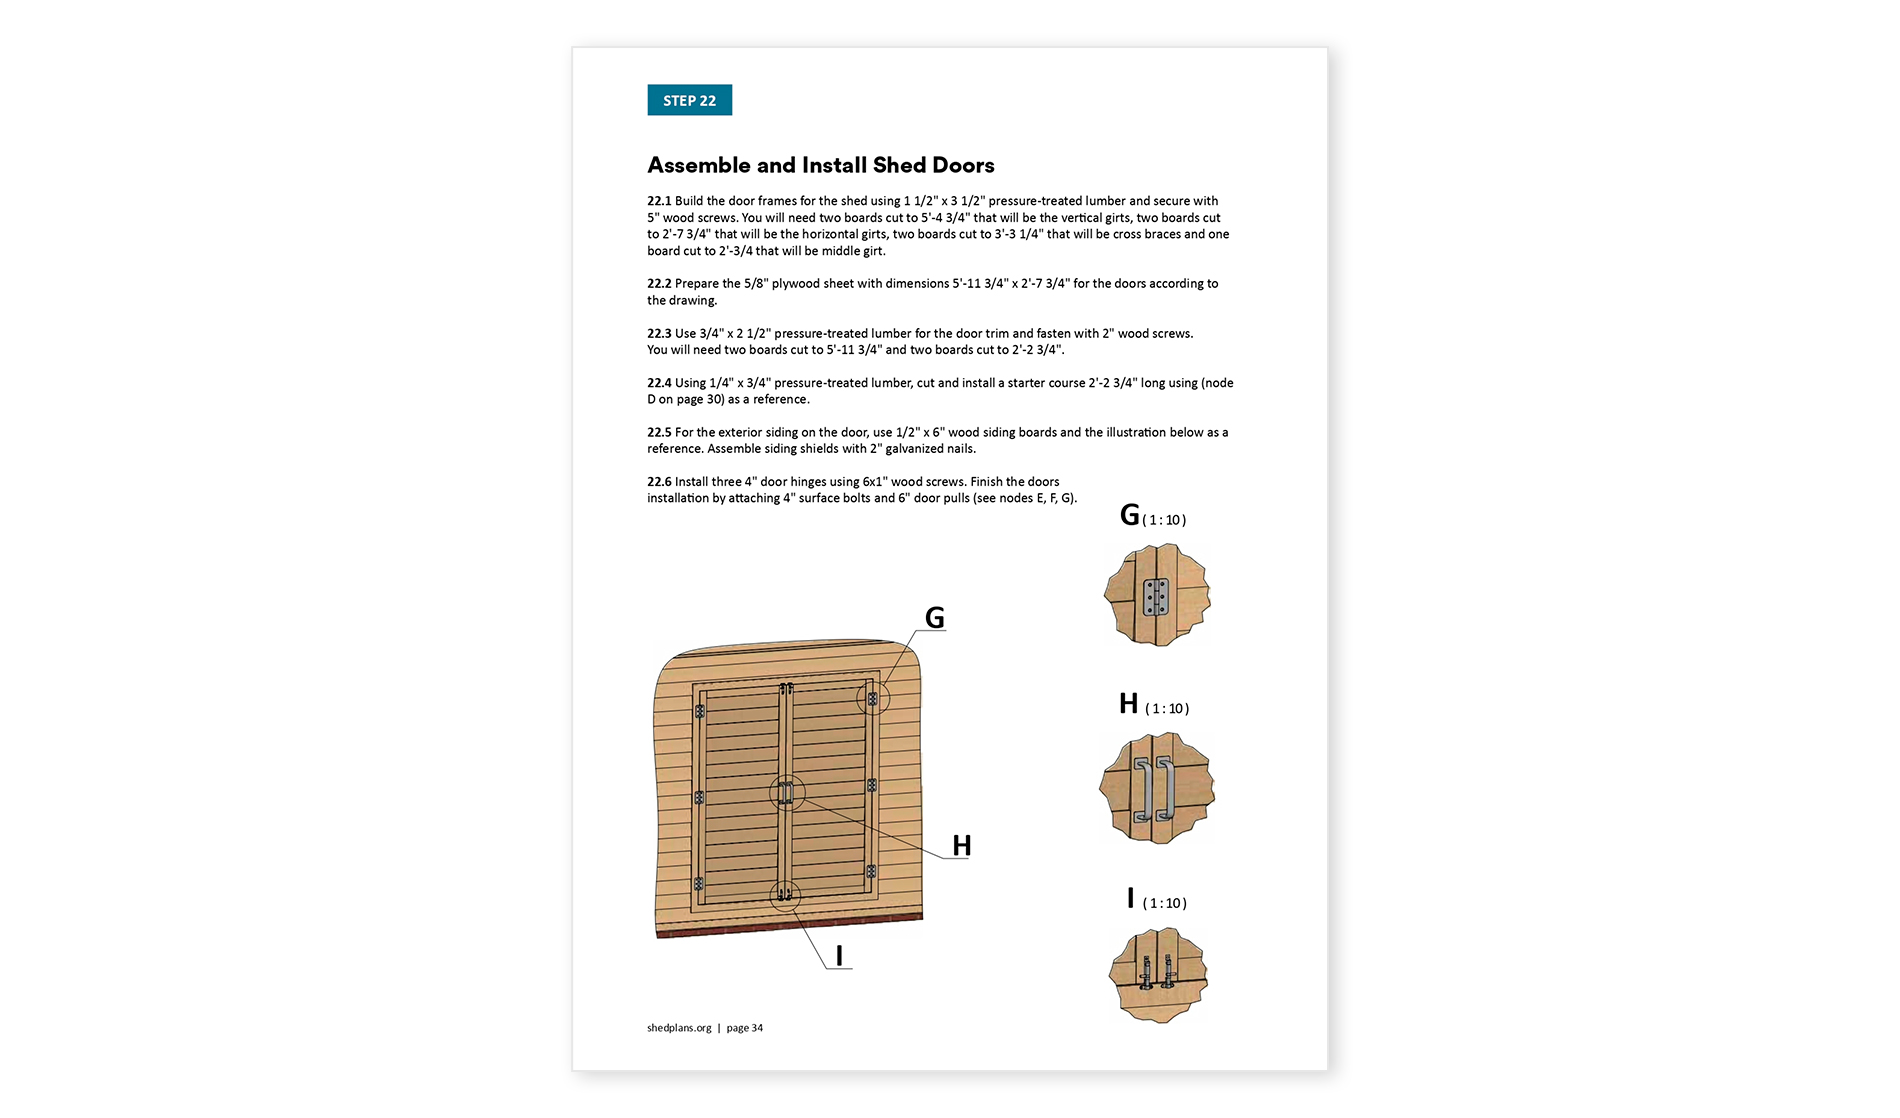
3. Install doors and windows: Ensure they fit snugly and operate smoothly.
Pro Tip: Paint or stain your shed to protect the wood and add a personal touch.
7. Interior Finishes: Creating a Useful Space
Now for the fun part â€" making your shed functional.
1. Install subfloor: This will create a solid base for your flooring.
2. Add flooring: Choose from wood, tile, or even a simple concrete floor.
3. Install shelves, benches, or a workbench: Organize your storage space effectively.
Pro Tip: Consider adding electrical outlets and lighting for convenience and safety.
Final Thoughts: A Shed of Your Own
Building a shed is a rewarding project that gives you a sense of accomplishment and a fantastic new addition to your property. Don't be afraid to ask for help if you're stuck. There are numerous online resources, YouTube tutorials, and helpful neighbors who might offer advice.
Remember, safety first! Wear appropriate clothing and safety glasses, and always follow tool instructions. And most importantly, have fun with it! Building a shed is a fantastic opportunity to unleash your creativity and develop your DIY skills.
No comments:
Post a Comment