Saturday, November 9, 2024
Diy 8x12 shed: design it, build it, save big

Alright, folks, let's talk sheds! You know that feeling, right? You're staring at your overflowing garage, your overflowing basement, and your overflowing... well, everything! It's time to get organized, and a good old-fashioned shed is the answer. But, let's be real, pre-built sheds can be a serious dent in the wallet.
That's where DIY comes in. You can build a beautiful, functional 8x12 shed and save a bunch of cash in the process. It's a weekend warrior project, sure, but trust me, the satisfaction of building your own space is priceless.
Let's Sketch Out a Plan:
First things first, we need a plan. Don't worry, you don't need to be an architect! Just think about what you want your shed to be.
Do you need a workshop? Maybe you're a woodworker, a mechanic, or a painter. You'll need space for tools, benches, and maybe even a small workbench.
Do you need storage? Think lawnmower, bikes, gardening equipment, or maybe just extra stuff that's cluttering up your garage.
Do you dream of a cozy hangout? A small shed can be the perfect escape, with a comfy chair, a table, and maybe even a small fireplace for those chilly nights.
Once you have an idea of the purpose, it's time to start sketching. Measure your space, think about the best location for your shed, and consider things like windows and doors.
Choosing the Right Materials:
The building materials are the heart of your shed. You've got options here, and your budget and desired aesthetic will guide your choices.
Pressure-treated lumber: This is a must for the foundation and bottom plates. It's resistant to rot and bugs, making it perfect for ground contact.
Framing lumber: You'll need 2x4s and maybe 2x6s for the walls and roof. Choose high-quality lumber for durability.
Sheathing: This goes on the walls and roof, adding strength and a base for siding and roofing. Plywood or OSB (oriented strand board) are common options.
Siding: Here's where you can really let your personality shine! Vinyl siding is durable and low-maintenance, but wood siding gives a classic look. You could even get creative with corrugated metal or fiber cement siding.
Roofing: Shingles are the classic choice, but metal roofing is gaining popularity for its durability and longevity.
Building the Foundation:
The foundation is the backbone of your shed. A simple concrete slab is a great option.
1. Excavate the area: Remove the top layer of soil, making sure the area is level.
2. Lay the concrete: Pour a slab about 4 inches thick, with rebar for reinforcement. Be sure to include a slope for drainage.
3. Let it cure: Concrete needs at least a week to fully cure before you can start building.
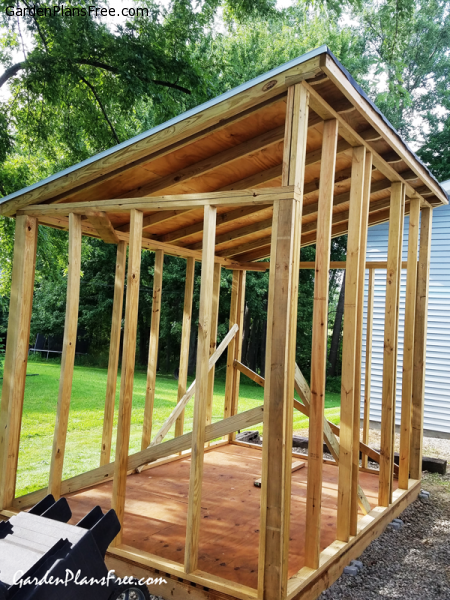
Framing Up the Walls and Roof:
Now we get to the fun part! Building the frame is like putting together a giant puzzle.
1. Start with the floor: Lay down the floor joists (2x10s or 2x12s) over the concrete foundation. Make sure they're spaced correctly and secured.
2. Build the walls: Cut the studs to the right height, attach them to the floor joists, and then add the top plate. Remember to leave openings for doors and windows.
3. Raise the walls: Get some help with this part! Carefully lift the walls into place and secure them to the floor joists.
4. Frame the roof: Build the roof trusses (or use pre-made trusses) and attach them to the top plates.
Adding the Finishing Touches:
Now it's time to turn your frame into a beautiful, functional shed!
1. Sheathing the walls and roof: Attach plywood or OSB to the frame, creating a solid base for your siding and roofing.
2. Siding and roofing: Install your chosen siding and roofing material, paying attention to details like flashing and trim.
3. Windows and doors: Install your windows and doors, making sure they're properly sealed and weatherproofed.
4. Interior finish: Add drywall, insulation, and paint to create a finished interior.
Don't Forget the Extras:
Now for the details that make your shed unique!
Lighting: Add electrical outlets and lights for both function and ambiance.
Ventilation: Install roof vents or gable vents to keep the air circulating.
Storage solutions: Shelves, pegboards, and cabinets will help you stay organized.
Personal touches: Add a doormat, a welcome sign, or some landscaping to make your shed feel like home.
You Did It!
Building your own shed is a rewarding experience. You've saved a ton of money, learned valuable skills, and created a space you can be proud of. So, go out there, grab your tools, and start building!
And hey, if you run into any questions or need help with the project, there are tons of resources available online and at your local hardware store. You've got this!
No comments:
Post a Comment